

LUMI_dev
오라클 배포 - maven,intellij, 오라클, CentOs8 (글 수정 중) 본문
[opc@toastgames ~]$ sudo lsof -i :8080
COMMAND     PID USER   FD   TYPE  DEVICE SIZE/OFF NODE NAME
rootlessp 46515  opc   11u  IPv6 1130803      0t0  TCP *:webcache (LISTEN)
[opc@toastgames ~]$
[opc@toastgames ~]$ podman logs mariadb
2025-03-15 02:32:32+00:00 [Note] [Entrypoint]: Entrypoint script for MariaDB Server 1:11.4.5+maria~ubu2404 started.
2025-03-15 02:32:35+00:00 [Warn] [Entrypoint]: /sys/fs/cgroup/rdma:/
11:cpuset:/
10:net_cls,net_prio:/
9:perf_event:/
8:devices:/system.slice/sshd.service
7:pids:/user.slice/user-1000.slice/session-4.scope
6:hugetlb:/
5:blkio:/
4:freezer:/
3:memory:/user.slice/user-1000.slice/session-4.scope
2:cpu,cpuacct:/user.slice
1:name=systemd:/user.slice/user-1000.slice/user@1000.service/user.slice/podman-41998.scope/62a79ca3e7f8f3fde02fb85c776cd95328fc0c25af8b626bdd07f634ef661424/memory.pressure not writable, functionality unavailable to MariaDB
2025-03-15 02:32:35+00:00 [Note] [Entrypoint]: Switching to dedicated user 'mysql'
2025-03-15 02:32:35+00:00 [Note] [Entrypoint]: Entrypoint script for MariaDB Server 1:11.4.5+maria~ubu2404 started.
2025-03-15 02:32:39+00:00 [Note] [Entrypoint]: Initializing database files
2025-03-15 2:32:40 0 [Warning] mariadbd: io_uring_queue_init() failed with errno 95
2025-03-15 2:32:40 0 [Warning] InnoDB: liburing disabled: falling back to innodb_use_native_aio=OFF
2025-03-15 02:32:48+00:00 [Note] [Entrypoint]: Database files initialized
2025-03-15 02:32:48+00:00 [Note] [Entrypoint]: Starting temporary server
2025-03-15 02:32:48+00:00 [Note] [Entrypoint]: Waiting for server startup
2025-03-15 2:32:49 0 [Note] Starting MariaDB 11.4.5-MariaDB-ubu2404 source revision 0771110266ff5c04216af4bf1243c65f8c67ccf4 server_uid 4DK3bL5G73QHN9kfe7YiVcEY030= as process 90
2025-03-15 2:32:49 0 [Note] InnoDB: Compressed tables use zlib 1.3
2025-03-15 2:32:49 0 [Note] InnoDB: Number of transaction pools: 1
2025-03-15 2:32:49 0 [Note] InnoDB: Using crc32 + pclmulqdq instructions
2025-03-15 2:32:49 0 [Note] mariadbd: O_TMPFILE is not supported on /tmp (disabling future attempts)
2025-03-15 2:32:49 0 [Warning] mariadbd: io_uring_queue_init() failed with errno 95
2025-03-15 2:32:49 0 [Warning] InnoDB: liburing disabled: falling back to innodb_use_native_aio=OFF
2025-03-15 2:32:49 0 [Note] InnoDB: Initializing buffer pool, total size = 128.000MiB, chunk size = 2.000MiB
2025-03-15 2:32:49 0 [Note] InnoDB: Completed initialization of buffer pool
2025-03-15 2:32:49 0 [Note] InnoDB: Buffered log writes (block size=512 bytes)
2025-03-15 2:32:50 0 [Note] InnoDB: End of log at LSN=47645
2025-03-15 2:32:51 0 [Note] InnoDB: Opened 3 undo tablespaces
2025-03-15 2:32:51 0 [Note] InnoDB: 128 rollback segments in 3 undo tablespaces are active.
2025-03-15 2:32:51 0 [Note] InnoDB: Setting file './ibtmp1' size to 12.000MiB. Physically writing the file full; Please wait ...
2025-03-15 2:32:51 0 [Note] InnoDB: File './ibtmp1' size is now 12.000MiB.
2025-03-15 2:32:51 0 [Note] InnoDB: log sequence number 47645; transaction id 14
2025-03-15 2:32:51 0 [Note] Plugin 'FEEDBACK' is disabled.
2025-03-15 2:32:51 0 [Note] Plugin 'wsrep-provider' is disabled.
2025-03-15 2:33:11 0 [Note] mariadbd: Event Scheduler: Loaded 0 events
2025-03-15 2:33:11 0 [Note] mariadbd: ready for connections.
Version: '11.4.5-MariaDB-ubu2404' socket: '/run/mysqld/mysqld.sock' port: 0 mariadb.org binary distribution
2025-03-15 02:33:12+00:00 [Note] [Entrypoint]: Temporary server started.
2025-03-15 02:33:15+00:00 [Note] [Entrypoint]: Securing system users (equivalent to running mysql_secure_installation)
2025-03-15 02:33:15+00:00 [Note] [Entrypoint]: Stopping temporary server
2025-03-15 2:33:15 0 [Note] mariadbd (initiated by: unknown): Normal shutdown
2025-03-15 2:33:15 0 [Note] InnoDB: FTS optimize thread exiting.
2025-03-15 2:33:15 0 [Note] InnoDB: Starting shutdown...
2025-03-15 2:33:15 0 [Note] InnoDB: Dumping buffer pool(s) to /var/lib/mysql/ib_buffer_pool
2025-03-15 2:33:15 0 [Note] InnoDB: Buffer pool(s) dump completed at 250315 2:33:15
2025-03-15 2:33:16 0 [Note] InnoDB: Removed temporary tablespace data file: "./ibtmp1"
2025-03-15 2:33:16 0 [Note] InnoDB: Shutdown completed; log sequence number 47645; transaction id 15
2025-03-15 2:33:16 0 [Note] mariadbd: Shutdown complete
2025-03-15 02:33:16+00:00 [Note] [Entrypoint]: Temporary server stopped
2025-03-15 02:33:16+00:00 [Note] [Entrypoint]: MariaDB init process done. Ready for start up.
2025-03-15 2:33:16 0 [Note] Starting MariaDB 11.4.5-MariaDB-ubu2404 source revision 0771110266ff5c04216af4bf1243c65f8c67ccf4 server_uid 4DK3bL5G73QHN9kfe7YiVcEY030= as process 1
2025-03-15 2:33:16 0 [Note] InnoDB: Compressed tables use zlib 1.3
2025-03-15 2:33:16 0 [Note] InnoDB: Number of transaction pools: 1
2025-03-15 2:33:16 0 [Note] InnoDB: Using crc32 + pclmulqdq instructions
2025-03-15 2:33:16 0 [Note] mariadbd: O_TMPFILE is not supported on /tmp (disabling future attempts)
2025-03-15 2:33:16 0 [Warning] mariadbd: io_uring_queue_init() failed with errno 95
2025-03-15 2:33:16 0 [Warning] InnoDB: liburing disabled: falling back to innodb_use_native_aio=OFF
2025-03-15 2:33:16 0 [Note] InnoDB: Initializing buffer pool, total size = 128.000MiB, chunk size = 2.000MiB
2025-03-15 2:33:16 0 [Note] InnoDB: Completed initialization of buffer pool
2025-03-15 2:33:16 0 [Note] InnoDB: Buffered log writes (block size=512 bytes)
2025-03-15 2:33:16 0 [Note] InnoDB: End of log at LSN=47645
2025-03-15 2:33:16 0 [Note] InnoDB: Opened 3 undo tablespaces
2025-03-15 2:33:16 0 [Note] InnoDB: 128 rollback segments in 3 undo tablespaces are active.
2025-03-15 2:33:16 0 [Note] InnoDB: Setting file './ibtmp1' size to 12.000MiB. Physically writing the file full; Please wait ...
2025-03-15 2:33:16 0 [Note] InnoDB: File './ibtmp1' size is now 12.000MiB.
2025-03-15 2:33:16 0 [Note] InnoDB: log sequence number 47645; transaction id 14
2025-03-15 2:33:16 0 [Note] Plugin 'FEEDBACK' is disabled.
2025-03-15 2:33:16 0 [Note] InnoDB: Loading buffer pool(s) from /var/lib/mysql/ib_buffer_pool
2025-03-15 2:33:16 0 [Note] Plugin 'wsrep-provider' is disabled.
2025-03-15 2:33:16 0 [Note] InnoDB: Buffer pool(s) load completed at 250315 2:33:16
2025-03-15 2:33:50 0 [Note] Server socket created on IP: '0.0.0.0'.
2025-03-15 2:33:50 0 [Note] Server socket created on IP: '::'.
2025-03-15 2:33:50 0 [Note] mariadbd: Event Scheduler: Loaded 0 events
2025-03-15 2:33:50 0 [Note] mariadbd: ready for connections.
Version: '11.4.5-MariaDB-ubu2404' socket: '/run/mysqld/mysqld.sock' port: 3306 mariadb.org binary distribution
war 파일의 프로젝트는 반드시!! application properties 설정 후에 진행
application.properties:
properties
복사
spring.datasource.url=jdbc:mysql://{외부 ip}:3306/gdj85_final
spring.datasource.username=root
spring.datasource.password=your_password
.pem 파일 변경
열어봤을 때 '-----BEGIN OPENSSH PRIVATE KEY-----'가 있어야 제대로 변환이 된 것임
jar 파일 배포
pom.xml에서 <packaging>jar</packaging> ▶ package


java 설치시 다음과 같은 에러 떴음
[opc@instance-20250305-0122 ~]$ sudo yum install java-17-openjdk-devel
Loaded plugins: fastestmirror, langpacks
Loading mirror speeds from cached hostfile
Could not retrieve mirrorlist http://mirrorlist.centos.org/?release=7&arch=x86_64&repo=os&infra=stock error was
14: curl#6 - "Could not resolve host: mirrorlist.centos.org; Unknown error"


 One of the configured repositories failed (Unknown),
 and yum doesn't have enough cached data to continue. At this point the only
 safe thing yum can do is fail. There are a few ways to work "fix" this:

     1. Contact the upstream for the repository and get them to fix the problem.

     2. Reconfigure the baseurl/etc. for the repository, to point to a working
        upstream. This is most often useful if you are using a newer
        distribution release than is supported by the repository (and the
        packages for the previous distribution release still work).

     3. Run the command with the repository temporarily disabled
            yum --disablerepo=<repoid> ...

     4. Disable the repository permanently, so yum won't use it by default. Yum
        will then just ignore the repository until you permanently enable it
        again or use --enablerepo for temporary usage:

            yum-config-manager --disable <repoid>
        or
            subscription-manager repos --disable=<repoid>

     5. Configure the failing repository to be skipped, if it is unavailable.
        Note that yum will try to contact the repo. when it runs most commands,
        so will have to try and fail each time (and thus. yum will be be much
        slower). If it is a very temporary problem though, this is often a nice
        compromise:

            yum-config-manager --save --setopt=<repoid>.skip_if_unavailable=true

Cannot find a valid baseurl for repo: base/7/x86_64
sudo nano /etc/yum.repos.d/CentOS-Base.repo를 통해 mirrorlist는 주석 처리 + baseurl은 주석을 풀어줬음
ctrl + O로 저장 ctrl + X로 나가기

배포 시 문제
baseurl 의 404 문제
> 아래 사이트 url에서 가져와야 함
https://vault.centos.org/8-stream/
Index of /8-stream
vault.centos.org
파일명 확인하기
ls /etc/yum.repos.d/
sudo rm /etc/yum.repos.d/CentOS-Stream-RealTime.repo
stream-붙은 파일 수정
sudo nano /etc/yum.repos.d/CentOS-Stream-Extras-common.repo
sudo nano /etc/yum.repos.d/CentOS-Stream-BaseOS.repo

[opc@instance-20250307-1223 ~]$ sudo nano /etc/yum.repos.d/CentOS-Stream.repo
[appstream]
baseurl=https://vault.centos.org/8-stream/AppStream/x86_64/os/
[opc@instance-20250307-1223 ~]$ sudo nano /etc/yum.repos.d/CentOS-Base.repo
[baseos]

baseurl=https://vault.centos.org/8-stream/BaseOS/x86_64/os/
[opc@instance-20250307-1223 ~]$ sudo nano /etc/yum.repos.d/CentOS-Extras.repo
[extras]
baseurl=https://vault.centos.org/8-stream/extras/x86_64/os/
sudo nano /etc/yum.repos.d/CentOS-Stream-Extras-common.repo
[extras-common]
name=CentOS Stream $releasever - Extras common packages
#mirrorlist=http://mirrorlist.centos.org/?release=$stream&arch=$basearch&repo=e$
baseurl=https://vault.centos.org/8-stream/extras/x86_64/extras-common/
gpgcheck=1
enabled=1
gpgkey=file:///etc/pki/rpm-gpg/RPM-GPG-KEY-CentOS-SIG-Extras
주의점 : CentOs8은 docker 대신 podman으로 실행시켜줘야함
1. sudo yum install -y
sudo yum update -y # yum이라는 프로그램 설치 패키지를 업데이트
#-y : 전반적으로 하라 / yum - 설치 권한 (관리자 권한으로 해야함)
2. sudo yum install podman
3. 톰캣 깔기
4.
podman run -d --name tomcat -p 8080:8080 tomcat:9.0
5.
톰캣의 위치가 제대로 안나올 때
-bash: cd: /usr/local/tomcat/bin: No such file or directory
[opc@toastgames ~]$ podman ps
CONTAINER ID IMAGE COMMAND CREATED STATUS PORTS NAMES
f13698a26108 docker.io/library/tomcat:9.0 catalina.sh run About a minute ago Up About a minute 0.0.0.0:8080->8080/tcp tomcat
[opc@toastgames ~]$ podman exec -it f13698a26108 /bin/bash
root@f13698a26108:/usr/local/tomcat#
cd /usr/local/tomcat/bin
./catalina.sh stop
6. 껐던 컨테이너 다시 켜고 카트리나 start
[opc@toastgames ~]$ # 컨테이너 재시작
podman restart f13698a26108
f13698a26108
[opc@toastgames ~]$ /usr/local/tomcat/bin/catalina.sh start
-bash: /usr/local/tomcat/bin/catalina.sh: No such file or directory
[opc@toastgames ~]$ podman exec -it f13698a26108 /bin/bash
root@f13698a26108:/usr/local/tomcat# /usr/local/tomcat/bin/catalina.sh start
Using CATALINA_BASE:   /usr/local/tomcat
Using CATALINA_HOME:   /usr/local/tomcat
Using CATALINA_TMPDIR: /usr/local/tomcat/temp
Using JRE_HOME:        /opt/java/openjdk
Using CLASSPATH:       /usr/local/tomcat/bin/bootstrap.jar:/usr/local/tomcat/bin/tomcat-juli.jar
Using CATALINA_OPTS:
Tomcat started.
root@f13698a26108:/usr/local/tomcat#
podman rm tomcat 시 에러
cannot remove container a6ca06f117dbe1146b0455c8ea4f0382efba9dc91ced7fcc0d37660626057d31 as it is running - running or paused containers cannot be removed without force: container state improper
해결
강제로(-f) 삭제
podman rm -f a6ca06f117dbe1146b0455c8ea4f0382efba9dc91ced7fcc0d37660626057d31
6.
podman cp ./ToastGames-0.0.1-SNAPSHOT.war tomcat:/usr/local/tomcat/webapps
ex) podman cp ./ToastGames-0.0.1-SNAPSHOT.war tomcat:/usr/local/tomcat/webapps
7. podman start tomcat
8. ps aux | grep tomcat
9. curl http://localhost:8080
or curl http://localhost:8080/ToastGames-0.0.1-SNAPSHOT/-> 이때 작성한 <html>이 잘뜨면 성공한 것
(8080 포트 사용하고 있는 PID kill하기)
curl http://localhost:8080/ToastGames
curl: (56) Recv failure: Connection reset by peer 에러 생김
제대로 배포되었는지 확인
[opc@toastgames ~]$ podman exec -it tomcat ls /usr/local/tomcat/webapps
ToastGames-0.0.1-SNAPSHOT ToastGames-0.0.1-SNAPSHOT.war
[opc@toastgames ~]$ podman exec -it tomcat ls /usr/local/tomcat/webapps/ToastGames-0.0.1-SNAPSHOT
만약 WEB-INF가 없다면? 제대로 배포되지 않은 것
front META-INF org views WEB-INF
http://localhost:8080/ToastGames-0.0.1-SNAPSHOT/
[opc@toastgames ~]$ curl http://localhost:8080/ToastGames-0.0.1-SNAPSHOT/
그 다음에 저기 적힌 주소로 들어가서 연결해보기
ex)
<html>
<head>
    <meta charset="UTF-8">
    <meta name="viewport" content="width=device-width, initial-scale=1">
    <title>Insert Title Here</title>
    <!-- <script src="https://code.jquery.com/jquery-3.7.1.min.js"></script> -->
    <link rel="stylesheet" type="text/css" href="resources/css/common.css" />
    <link rel="stylesheet" type="text/css" href="resources/css/layout.css" />
    <link rel="stylesheet" type="text/css" href="resources/css/login.css" />
</head>
<body>


<div class="tst_topnav">
    <div class="tst_wrapper tst_flex align_middle">
        <div class="tst_col2 logo align_middle">
            <img src="resources/img/logo.jpg" alt="" />
        </div>
        <ul class="tst_col8"></ul>
        <div class="tst_col2"></div>
트러블 슈팅) local로는 접속이 되는데.. 외부 IP로는 접속이 안됨
해결) vi를 깐 후 그것으로 server.xml 파일을 찾아서 외부 접속이 가능하도록 address 설정을 해줌
[opc@toastgames ~]$ sudo find / -type d -name "tomcat"
------------------------------------------------------------------------------------
/var/lib/selinux/targeted/active/modules/100/tomcat
/usr/share/selinux/targeted/default/active/modules/100/tomcat
/home/opc/.local/share/containers/storage/overlay/a7c5adb82aa8161f214d46dc1b3798 26d8a373b309d50890e2b80768f9d8b7cd/diff/usr/local/tomcat
/home/opc/.local/share/containers/storage/overlay/277a3115aaa37f3afd442dff92b1fc 5f47041042527097a0f81d25328a13565e/diff/usr/local/tomcat
/home/opc/.local/share/containers/storage/overlay/da6033a28bd20edcbd128215cf9eff 568d41c929e17932b6f24c6f09b60d9a58/diff/usr/local/tomcat
------------------------------------------------------------------------------------
[opc@toastgames ~]$ podman exec -it tomcat /bin/bash
root@375e806b78b5:/usr/local/tomcat#
root@375e806b78b5:/usr/local/tomcat# vi /usr/local/tomcat/conf/server.xml
//bash: vi: command not found 에러가 뜨면!!
apt-get update
apt-get install vim 명령어 쳐주기
그리고 vi /usr/local/tomcat/conf/server.xml 다시 한 후에 아래 수행하기
server.xml의 Connector태그 부분에 address="0.0.0.0" 넣기

- 파일 저장하기:
- 파일을 수정한 후, Esc 키를 눌러 편집 모드에서 빠져 나옵니다.
- 그런 다음 :w를 입력하고 Enter 키를 눌러 저장합니다.
- 파일 저장 후 종료하기:
- 파일을 저장한 후 :q를 입력하고 Enter 키를 눌러 종료합니다.
- 파일 저장 후 종료 (한 번에):
- :wq를 입력하고 Enter 키를 눌러 파일을 저장하고 종료할 수 있습니다.
그 다음에 끄고 다시 켜기
[opc@toastgames ~] /usr/local/tomcat/bin/catalina.sh stop
[opc@toastgames ~] /usr/local/tomcat/bin/catalina.sh start
[opc@toastgames ~]$ podman restart tomcat
[opc@toastgames ~]$ ip route
default via 10.0.0.1 dev ens3 proto dhcp src 10.0.0.54 metric 100
10.0.0.0/24 dev ens3 proto kernel scope link src 10.0.0.54 metric 100
169.254.0.0/16 dev ens3 proto dhcp scope link src 10.0.0.54 metric 100
[opc@toastgames ~]$ curl http://{외부 ip}:8080
이때 html이 제대로 뜨면 성공한 것 url에 쳐도 배포됨
안되고 다음과 같은 에러가 뜨면!
40.245.71.151[opc@toastgames ~]$ curl http:// {외부 ip} :8080
curl: (7) Failed to connect to {외부 ip} port 8080: No route to host
[opc@toastgames ~]$ # 8080 포트 열기
sudo firewall-cmd --zone=public --add-port=8080/tcp --permanent
sudo firewall-cmd --reload
success가 뜨면 성공한 것
---------------중간에 작성하다가 날아가서 보충해야함 --------------------------
DB 배포 (진행 중)
OCI 접속
메뉴바에서 Oracle Database > Autonomous Database
dbeaver연결
만약 connection.failed 뜨면
ss -tuln | grep 3308 실행해보고 3308 포트 열려있는지 확인
3308 포트 여는 법
sudo ufw allow 3308/tcp
- 보안 그룹을 선택하고, Inbound Rules를 수정하여 3308 포트를 허용합니다.
CentOS/RHEL 계열:
putty
# 1.mariadb 이미지 다운로드
docker search mariadb #5800개 star이 있는 official mariadb 다운로드 받기
2. docker pull mariadb:11.4
3. podman run -d --name mariadb -p 3308:3308 -e MYSQL_ROOT_PASSWORD={비번} mariadb:11.4
$ podman run -d --name mariadb -p 3308:3308 -e MYSQL_ROOT_PASSWORD={비번} mariadb:11.4
비번 까먹었으면 아래 방법으로 비번 바꾸기
USE mysql;
UPDATE user SET authentication_string = PASSWORD('비번') WHERE User = 'root';
FLUSH PRIVILEGES;
3ead5b16832f94fc3442375eee760f6a2f0c45375242b38dc08e337c9b1ab9de
에러 : 위 명령어 실행후 podman ps로 실행중인 컨테이너 확인했을 때 없어서 아래와 같이 에러 확인함
podman logs mariadb
/bin/bash: error while loading shared libraries: /lib/x86_64-linux-gnu/libc.so.6: cannot apply additional memory protection after relocation: Permission denied
해결 1.
sudo setenforce 0 # SELinux를 Permissive 모드로 전환
SELinux가 활성화된 시스템에서는, 컨테이너가 사용하는 메모리 영역에 대해 추가적인 보호를 적용하려 할 때 권한 문제를 일으킬 수 있습니다.
- SELinux를 허용 모드로 설정하여 이 문제를 해결할 수 있습니다.
- SELinux 설정을 permissive 모드로 변경하여 이 문제를 완화할 수 있습니다. (/etc/selinux/config 파일에서 설정 가능)
다음과 같이 제대로 뜸

컨테이너 이름이 mariadb
podman exec -it mariadb /bin/bash
# 컨테이너명 mariadb 다음에는 띄어쓰기 필수!
[opc@toastgames ~]$ podman exec -it mariadb /bin/bash
root@62a79ca3e7f8:/# pwd
/
root@62a79ca3e7f8:/#  ls
bin                         etc                media  run                 tmp
bin.usr-is-merged           home               mnt    sbin                usr
boot                        lib                opt    sbin.usr-is-merged  var
dev                         lib.usr-is-merged  proc   srv
docker-entrypoint-initdb.d  lib64              root   sys
[opc@toastgames ~]$ podman cp ./dump_gdjfinal_202501171552.sql mariadb:/home/
[opc@toastgames ~]$ podman exec -it mariadb /bin/bash
root@62a79ca3e7f8:/# ls /home/
dump_gdjfinal_202501171552.sql
root@62a79ca3e7f8:/#
만약 3308 사용 에러 나면
sudo lsof -i :3308
에러
트러블 슈팅) 아래 에러 혹은 Connection refused 에러남

해결방법
mysql -u root -p 대신 사용
podman exec -it mariadb mariadb -u root -p
[opc@toastgames ~]$ mysql -u root -p or
podman exec -it mariadb mariadb -u root -p

Enter password:
Welcome to the MariaDB monitor.  Commands end with ; or \g.
Your MariaDB connection id is 9
Server version: 10.3.28-MariaDB MariaDB Server

Copyright (c) 2000, 2018, Oracle, MariaDB Corporation Ab and others.

Type 'help;' or '\h' for help. Type '\c' to clear the current input statement.

MariaDB [(none)]> show global variables like 'PORT'
    -> ;
+---------------+-------+
| Variable_name | Value |
+---------------+-------+
| port          | 3306  |
+---------------+-------+
1 row in set (0.024 sec)

MariaDB [(none)]>
[opc@toastgames ~]$ sudo find / -name "my.cnf" 2>/dev/null
/etc/my.cnf
/var/lib/containers/storage/overlay/559cebad4d14dcc75ef29fc9a371baa208121c33a040f54ee3a4fe29c1cb0a03/diff/etc/alternatives/my.cnf
/var/lib/containers/storage/overlay/559cebad4d14dcc75ef29fc9a371baa208121c33a040f54ee3a4fe29c1cb0a03/diff/etc/mysql/my.cnf
/var/lib/containers/storage/overlay/559cebad4d14dcc75ef29fc9a371baa208121c33a040f54ee3a4fe29c1cb0a03/diff/var/lib/dpkg/alternatives/my.cnf
create database gdj85_final;
sudo nano /etc/my.cnf로 열기
3308포트 추가 (이것만으로 해결 못함)

(해결) 그래도 안되면 다음 수행 .cnf 파일 모두 찾아서 포트 번호 바꿔주기
[opc@toastgames ~]$ podman exec -it mariadb ls /etc/
adduser.conf gai.conf ld.so.conf pam.d shadow-
alternatives gnutls ld.so.conf.d passwd shells
apparmor.d group legal passwd- skel
apt group- libaudit.conf perl ssl
bash.bashrc gshadow localtime profile subgid
bindresvport.blacklist gshadow- logcheck profile.d subgid-
ca-certificates gss login.defs rc0.d subuid
ca-certificates.conf host.conf logrotate.d rc1.d subuid-
cloud hostname lsb-release rc2.d sysctl.conf
cron.d hosts machine-id rc3.d sysctl.d
cron.daily hosts.allow mke2fs.conf rc4.d systemd
debconf.conf hosts.deny mtab rc5.d terminfo
debian_version init.d mysql rc6.d timezone
default inputrc netconfig rcS.d update-motd.d
deluser.conf iproute2 networks resolv.conf xattr.conf
dpkg issue nsswitch.conf rmt
e2scrub.conf issue.net opt security
environment kernel os-release selinux
fstab ld.so.cache pam.conf shadow
[opc@toastgames ~]$
- 파일 복사:
2. 로컬에서 파일 수정
포트를 3308로 수정
(수정할 때 잠깐 안써지니 막 키보드 연타해서 글자 입력되면 그때 수정하기
이때.... 다른 키 ctrl + s 등 누르면 렉걸린다... 수십번 끄고 켰따가ㅏ)

3. 수정된 파일을 다시 컨테이너로 복사:
파일을 수정한 후, 컨테이너로 다시 복사합니다.
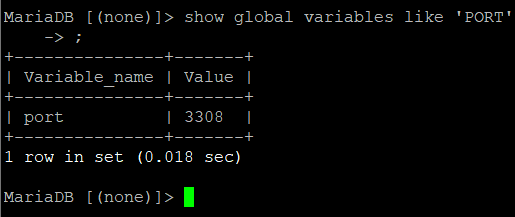
show global variables like 'PORT'
위에 3308로 바꿔주면 이제 연결됨..

만약 안되면 podman restart mariadb해주기
dbeaver에서 다음과 같은 설정해주기
CREATE DATABASE ToastGames;
use ToastGames;

show tables;
혹은 mysql -u root -p > create databases (덤프본 복사받을 테이블명);
5. sudo dnf install mariadb
6. mysql -u root -h {외부 IP} -P 3308 gdj85_final -p < /home/opc/dump_gdjfinal_202501171552.sql
7. 아래와 같은 에러 뜨면 굵은 글씨 실행
// nano /home/opc/dump_gdjfinal_202501171552.sql //덤프 받은 DB 여는
첫번째 에러. Unknown command '\-'.
1. sed 's/\\-/-/g' /home/opc/dump_gdjfinal_202501171552.sql > /home/opc/dump_gdjfinal_fixed.sql
2. mysql -u root -p gdj85_final < /home/opc/dump_gdjfinal_fixed.sql
or mysql -u root -h 140.245.71.151 -P 3308 gdj85_final -p < /home/opc/dump_gdjfinal_fixed.sql
두번째 에러 Unknown collation: 'utf8mb4_uca1400_ai_ci'
sed 's/utf8mb4_uca1400_ai_ci/utf8mb4_unicode_ci/g' /home/opc/dump_gdjfinal_fixed.sql > /home/opc/dump_gdjfinal_fixed2.sql
mysql -u root -p gdj85_final </home/opc/dump_gdjfinal_fixed2.sql
8. mysql -u root - p들어가서 SHOW DATABASES; > USE 데이터베이스명 > SHOW TABLES해서 들어갔는지 확인
9. 외부 ip 들어갈 수 있게 설정
ls /etc/my.cnf.d/
auth_gssapi.cnf enable_encryption.preset mysql-clients.cnf
client.cnf mariadb-server.cnf
sudo nano /etc/my.cnf.d/mariadb-server.cnf

다음 설정해주기

방화벽 열어주기
sudo firewall-cmd --zone=public --add-port=3308/tcp --permanent
sudo firewall-cmd --reload
9. mysql -h <외부 ip> -P 3308 -u root -p
에러)
Lost connection to MySQL server at 'handshake: reading initial communication packet', system error: 11
-- 사용자가 없다면 사용자 생성
CREATE USER 'root'@'%' IDENTIFIED BY '비번';
-- 권한 부여
GRANT ALL PRIVILEGES ON *.* TO 'root'@'%' WITH GRANT OPTION;
-- 권한 적용
FLUSH PRIVILEGES;
container_name_or_id아는 방법
podman ps
cnf 파일 찾는 법=
[opc@toastgames ~]$ find / -name "my.cnf" 2>/dev/null
/etc/my.cnf -> 이게 mysql 관련 파일
/home/opc/.local/share/containers/storage/overlay/8897dafdfbeeb716666d7052cfb5c8296461ce9c3edea194a3bbb7b2c7ec1a81/diff/etc/alternatives/my.cnf
/home/opc/.local/share/containers/storage/overlay/8897dafdfbeeb716666d7052cfb5c8296461ce9c3edea194a3bbb7b2c7ec1a81/diff/etc/mysql/my.cnf
/home/opc/.local/share/containers/storage/overlay/8897dafdfbeeb716666d7052cfb5c8296461ce9c3edea194a3bbb7b2c7ec1a81/diff/var/lib/dpkg/alternatives/my.cnf
/tmp/my.cnf
[opc@toastgames ~]$
1. sql 덤프 파일 옮기기
podman cp /home/opc/dump-gdjfinal-202501171552.sql mariadb:/home/

2.  ls -l /home/opc/ 하위에 sql 파일 있는지 보기
 ls -l /home/opc/
total 186564
-rw-rw-r--. 1 opc opc   2650701 Mar 15 11:56 dump-gdjfinal-202501171552.sql
-rw-rw-r--. 1 opc opc 104828097 Mar 12 07:01 ToastGames-0.0.1-SNAPSHOT.war
-rw-rw-r--. 1 opc opc  83556798 Mar 12 07:01 ToastGames-0.0.1-SNAPSHOT.war.original
[opc@toastgames ~]$


없으면
 mariadb  -u root -p gdj85_final <dump-gdjfinal.sql
sudo yum install epel-release

sudo yum install mariadb-client


----------------------------------------
2. 기본 설정 끝나면 연결시켜주기
 podman run -d --name mariadb -p 3308:3308 -e MYSQL_ROOT_PASSWORD={비번} mariadb:11.4
podman rm mariadb
 podman run -d --name mariadb -p 3308:3308 -e MYSQL_ROOT_PASSWORD={비번} mariadb:11.4

podman exec -it mariadb mariadb -u root -p

podman cp mariadb:/etc/mysql/my.cnf /tmp/my.cnf
[opc@toastgames ~]$ vi /tmp/my.cnf
port : 3308로 바꿔줌
[opc@toastgames ~]$ podman cp /tmp/my.cnf mariadb:/etc/mysql/my.cnf

show global variables like 'PORT'

podman restart mariadb

----------------------------------------

[opc@toastgames ~]$ podman exec -it mariadb ls /etc/mysql/
conf.d  debian-start  debian.cnf  mariadb.cnf  mariadb.conf.d  my.cnf

nano 설치
podman exec -it mariadb apt-get update && apt-get install nano

mysql -u root -p gdj85_final < /home/opc/dump-gdjfinal.sql


/home/opc/dump-gdjfinal.sql


mysql -u root -h 140.245.71.151 -P 3308 gdj85_final -p < /home/opc/dump-gdjfinal.sql

---------------------------
8080 서버 및 war 경로 바꾸기
1) sudo yum install nginx   # CentOS/RHEL 시스템에서 Nginx 설치

2) 설정 바꾸기
sudo vi /etc/nginx/nginx.conf


location에 war 안붙이는 거 중요!


 server {
    listen       80;
    listen       [::]:80 default_server;
    server_name  140.245.71.151;
    root         /usr/share/nginx/html;

    # 요청을 애플리케이션 경로로 전달

location / {
        # /ToastGames-0.0.1-SNAPSHOT/ 를 /로 변경해서 전달
        rewrite ^/ToastGames-0.0.1-SNAPSHOT/(.*)$ /$1 break;

        # 내부 애플리케이션 주소로 요청 전달
        proxy_pass http://140.245.71.151/ToastGames-0.0.1-SNAPSHOT/;

        # 리다이렉트 URL 수정 (애플리케이션이 /ToastGames-0.0.1-SNAPSHOT/을 포함한 리다이렉트
 요청을 보내는 경우 수정)
        proxy_redirect http://140.245.71.151/ToastGames-0.0.1-SNAPSHOT/ http://140.245.71.151/;
        # 필요한 헤더 정보 전달
        proxy_set_header Host $host;
        proxy_set_header X-Real-IP $remote_addr;
        proxy_set_header X-Forwarded-For $proxy_add_x_forwarded_for;

        # 쿠키 정보를 그대로 전달하여 세션 유지
        proxy_set_header Cookie $http_cookie;
    }


location /ToastGames-0.0.1-SNAPSHOT/


3) 설정 오류 없는지 보기

 sudo nginx -t
nginx: the configuration file /etc/nginx/nginx.conf syntax is ok
nginx: configuration file /etc/nginx/nginx.conf test is successful

4) 다시 시작하기
sudo systemctl restart nginx

5) 80 서버 방화벽 열어주기
sudo firewall-cmd --zone=public --add-port=80/tcp --permanent

sudo firewall-cmd --reload

리다이렉션할 때 /ToastGames-0.0.1-SNAPSHOT/계속 안사라짐